What is a Breadboard?
Many electronics projects use something called a breadboard. What is a breadboard, and how do you use it? This tutorial video will give you a basic introduction to breadboards and explain how to use them in beginner electronics projects; you can also read more details and see more examples in the text sections.
A breadboard is a rectangular plastic board with a bunch of tiny holes in it. These holes let you easily insert electronic components to prototype (meaning to build and test an early version of) an electronic circuit, like this one with a battery, switch, resistor, and an LED (light-emitting diode). To learn more about individual electronic components, see our Electronics Primer.
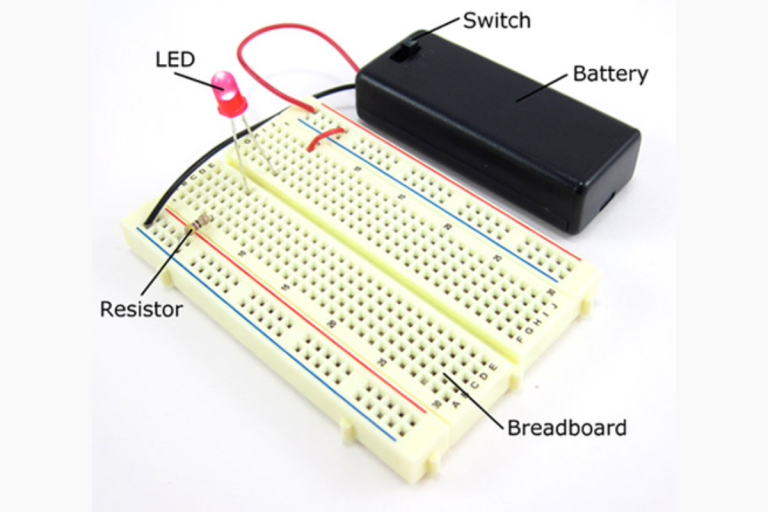
The connections are not permanent, so it is easy to remove a component if you make a mistake, or just start over and do a new project. This makes breadboards great for beginners who are new to electronics. You can use breadboards to make all sorts of fun electronics projects, from different types of robots or an electronic drum set, to an electronic rain detector to help conserve water in a garden, just to name a few.


What is a “solderless” breadboard?
Technically, these breadboards are called solderless breadboards because they do not require soldering to make connections. Soldering (pronounced SAW-der-ing) is a method where electronic components are joined together by melting a special type of metal called solder. Electronic components can be soldered directly together, but more commonly they are soldered onto printed circuit boards (PCBs). PCBs are what you will see if you take the cover off many electronic devices, like a computer or cell phone.
Frequently, engineers will use solderless breadboards to prototype and test a circuit before building the final, permanent design on a PCB. This image shows the same circuit (battery, switch, resistor, and LED) built three different ways: on a solderless breadboard (left), with the components soldered directly together (middle), and on a printed circuit board (right):Soldering is a great technique to learn if you are interested in electronics, but the connections are much more permanent and it requires purchasing some tools to get started. The rest of this tutorial will focus on solderless breadboards, but you can read our soldering tutorial to learn more about soldering.
What are jumper wires and what kind should I use?
- Jumper wires are wires that are used to make connections on a breadboard. They have stiff ends that are easy to push into the breadboard holes. There are several different options available when purchasing jumper wires.
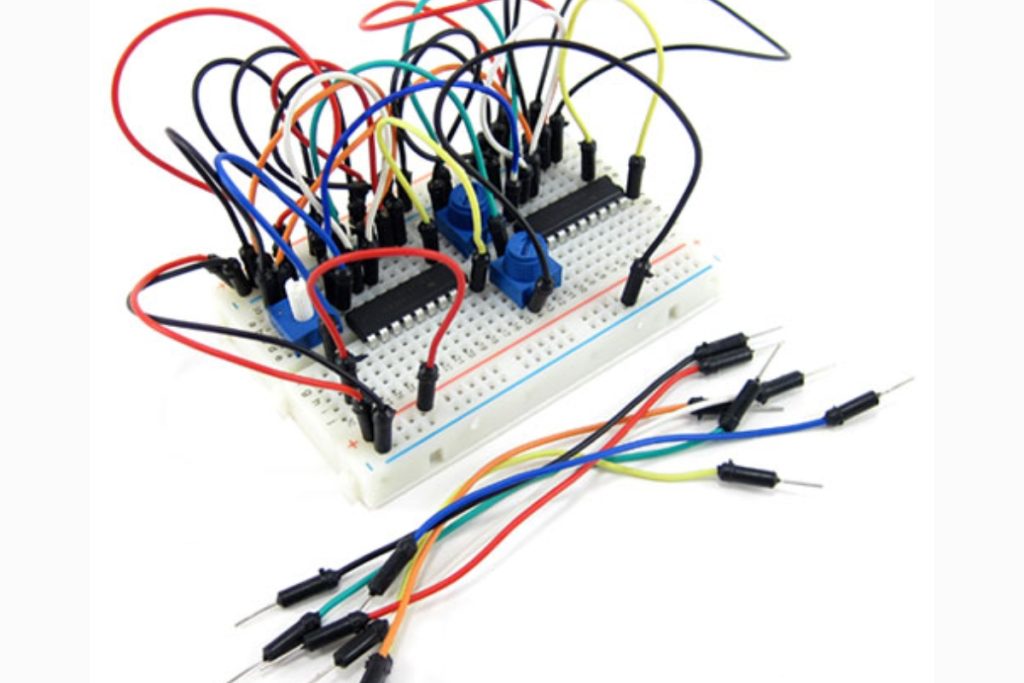
- Flexible jumper wires are made of a flexible wire with a rigid pin attached to both ends. These wires usually come in packs of varying colors. This makes it easy to color-code your circuit (see the section on color-coding). While these wires are easy to use for beginner circuits, they can get very messy for more complicated circuits; because they are so long, you will wind up with a tangled nest of wires that are hard to trace (sometimes called a “rat’s nest” or “spaghetti”).
Jumper wire kits are packs of pre-cut lengths of wire that have their ends bent down 90 degrees, so they are ready to put into a breadboard. The kits are available in larger and smaller sizes. These kits are very convenient because they come with wires of many different pre-cut lengths. The disadvantage is that there is typically only one length of each color. This can make it difficult to color-code your circuit (for example, you might want a long black wire, but your kit might only have short black wires). Your circuit will still work just fine, but color-coding can help you stay more organized (again, see the section on color-coding for more information). Notice how this circuit looks much less messy than the previous one, since the wires are shorter.


